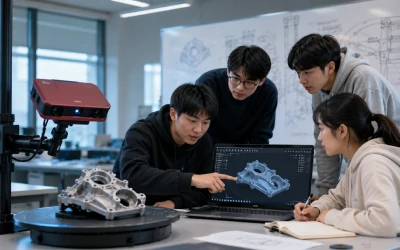

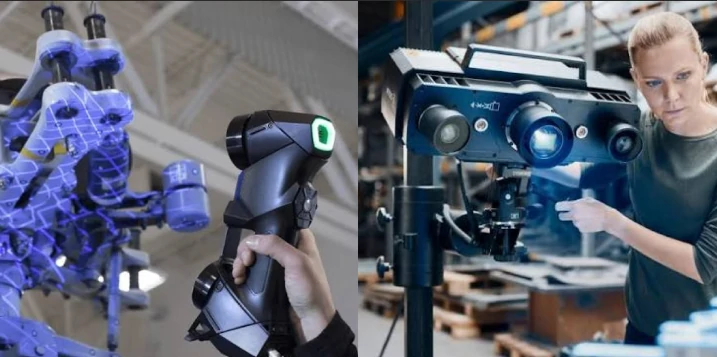
A 3D scanner captures the shape of a physical object or space and converts it into a digital 3D model. It helps teams measure parts, inspect quality, reverse-engineer components, document objects, and prepare assets for CAD, 3D printing, or visualization. Modern systems range from smartphone apps to metrology-grade industrial scanners such as STScan solutions.
Video Guide: This overview is a useful starting point for understanding the major concepts, workflows, and real-world uses of 3D scanning.
Definition and Purpose
A 3D scanner is a device that records an object’s geometry by measuring points across its surface, then converting those measurements into a digital model. Depending on the technology, it may use structured light, lasers, photogrammetry, or depth sensors to create accurate 3D data for inspection, design, and manufacturing.
Video Guide: This video explains the basic idea of 3D scanning and how physical shapes become digital 3D data.
Core Concept and Output
A 3D scanner does not simply take a photo. Instead, it collects spatial information: width, height, depth, surface curves, edges, and sometimes texture or color. The raw scan is usually captured as a point cloud, which can then be processed into a mesh or converted into CAD-ready geometry.
Common outputs include:
- Point cloud: A collection of measured 3D coordinates.
- Mesh model: A surface made from connected triangles, often saved as STL, OBJ, or PLY.
- CAD model: A parametric or editable engineering model used in design and manufacturing.
- Inspection report: A comparison between scanned data and nominal CAD data.
Typical use cases include:
- Industrial inspection for checking part dimensions and tolerances.
- Reverse engineering when drawings or CAD files are unavailable.
- Product development for capturing prototypes and legacy components.
- Cultural preservation for digitizing artifacts and sculptures.
- 3D printing preparation for reproducing or modifying physical objects.
STScan Pro Tip: I always recommend defining the final output first. If you need a visual model, a mesh may be enough; if you need manufacturing data, plan for CAD reconstruction and inspection-grade accuracy from the beginning.
How the Technology Works
Most 3D scanners project light, emit lasers, or analyze multiple images to calculate the distance between the scanner and the object’s surface. Software then aligns many captured views, removes noise, builds a complete model, and exports the data into formats suitable for measurement, design, or fabrication.
Video Guide: This guide breaks down scanning fundamentals and helps explain how capture, alignment, and model creation fit together.
Scanning Workflow from Capture to Model
The working process depends on the scanner type, but the general workflow is similar across professional systems. Industrial structured-light scanners, for example, project a known pattern onto the object. Cameras observe how that pattern deforms across the surface, and software calculates precise 3D coordinates.
A typical workflow looks like this:
- Prepare the object Clean the surface, stabilize the part, and consider whether reflective or transparent areas need scanning spray.
- Capture surface data The scanner records geometry from one or more angles using light, lasers, or camera-based reconstruction.
- Align multiple scans Software stitches different views together using markers, geometry, turntables, or markerless algorithms.
- Generate a point cloud The measured coordinates form the raw 3D representation of the object.
- Create a mesh The point cloud is converted into a continuous surface, usually made of triangles.
- Export or inspect The model can be exported for CAD, reverse engineering, 3D printing, or dimensional inspection.
STScan high-precision systems use self-developed blue-light structured-light core technology, enabling strong resistance to ambient light interference and high measurement stability. With markerless automatic stitching, portable hardware, and broad data compatibility, they are well suited for industrial inspection and reverse engineering workflows.
STScan Pro Tip: I avoid rushing the preparation stage. A stable setup, correct exposure, and consistent scanning distance often improve final accuracy more than simply buying a higher-resolution device.
iPhone Scanning Capabilities
Yes, an iPhone can be used as a basic 3D scanner through LiDAR-enabled models or photogrammetry apps, but it is best for quick visual capture rather than precision engineering. It works well for rooms, people, furniture, and rough models, but not for tight-tolerance industrial inspection.
Video Guide: This hands-on video is helpful for understanding what surprises users often encounter when trying 3D scanning for the first time.
Smartphone Scanning Versus Dedicated Hardware
iPhone scanning is convenient because the device is already portable, easy to use, and supported by many apps. However, the performance depends heavily on the iPhone model, lighting, object size, surface texture, and software workflow.
Based on our internal data and market analysis, here is the breakdown:
| Option | Best For | Strengths | Limitations |
|---|---|---|---|
| iPhone LiDAR | Rooms, furniture, quick spatial capture | Fast, portable, easy to learn | Lower detail on small parts |
| iPhone photogrammetry | Textured objects, visual models | Low cost, color capture | Needs many photos and good lighting |
| Entry-level handheld scanner | Hobby models, basic reverse engineering | Better geometry than phone apps | May struggle with dark or shiny surfaces |
| Industrial structured-light scanner | Inspection, engineering, precision parts | High accuracy and repeatability | Higher cost and more technical setup |
For casual scanning, an iPhone is often enough. For manufacturing, fit verification, tolerance analysis, or reverse engineering, a dedicated scanner is usually the better choice. STScan systems, for example, are designed for high-precision work where repeatability, scan speed, and reliable alignment matter.
STScan Pro Tip: I treat phone scans as a planning or visualization tool, not a metrology tool. If a part needs to fit, seal, rotate, or pass inspection, use a dedicated scanner with verified accuracy.
Beginner-Friendly Options
The best beginner 3D scanner is one that matches the user’s object size, accuracy needs, software comfort, and budget. For hobby use, simplicity matters most; for professional use, beginners should prioritize stable calibration, guided software, fast alignment, and reliable technical support over headline specifications alone.
Video Guide: This getting-started walkthrough is useful for beginners who want to understand the first steps in a scanning workflow.
How to Choose an Easy First Scanner
A beginner-friendly scanner should reduce setup friction. That means clear software guidance, predictable tracking, manageable file sizes, and a workflow that does not require constant manual correction.
When choosing a first scanner, consider:
- Object size range: Small mechanical parts require different optics than human-body or room scanning.
- Accuracy requirement: Hobby projects may tolerate millimeter-level accuracy; inspection work may require far tighter results.
- Surface type: Dark, shiny, transparent, or featureless objects are harder to scan.
- Software workflow: Good alignment, cleanup, and export tools matter as much as the hardware.
- Support and documentation: Training resources can save many hours of trial and error.
- Upgrade path: A beginner setup should still support future use cases if your needs grow.
For industrial beginners, STScan is positioned around practical usability as well as technical performance. Its self-developed algorithms support markerless automatic stitching, while blue-light structured-light technology improves stability under challenging lighting conditions. The result is a system that can support new users without sacrificing professional capability.
STScan Pro Tip: I recommend beginners scan simple matte objects first. Once you understand distance, angle, overlap, and exposure, challenging materials become much easier to manage.
Common Limitations
3D scanners can be limited by reflective surfaces, transparent materials, deep holes, occluded areas, large file sizes, calibration needs, and user technique. They are powerful tools, but they do not automatically create perfect CAD models; scanning, cleanup, alignment, and interpretation still require a controlled workflow.
Video Guide: This buying-focused video helps highlight practical issues users should understand before investing in a scanner.
Practical Challenges to Expect
Even high-quality scanners face physical and workflow constraints. A scanner must “see” the surface to measure it, so hidden areas, sharp internal corners, and highly reflective materials can cause incomplete or noisy data. Software can help, but it cannot fully recover geometry that was never captured.
Common disadvantages include:
- Surface sensitivity Shiny, black, transparent, or translucent objects may require scanning spray or special preparation.
- Line-of-sight limitations Deep cavities, undercuts, and internal channels can be difficult or impossible to capture directly.
- Data cleanup requirements Raw scans often need trimming, hole filling, smoothing, and alignment verification.
- Large file sizes High-resolution scans can create heavy mesh files that require strong computer hardware.
- Accuracy depends on workflow Calibration, scanning distance, exposure, and operator technique all affect the result.
- CAD conversion is not automatic A mesh is not the same as an editable parametric CAD model.
Advanced systems reduce these problems but do not eliminate every limitation. STScan addresses several common issues through anti-ambient-light blue-light structured-light technology, fast scanning, and markerless automatic stitching, helping users improve efficiency and reliability in demanding environments.
STScan Pro Tip: I always test-scan a difficult material before committing to a full project. A five-minute trial can reveal whether you need spray, markers, different lighting, or a revised scanning angle.
Key Features & Comparison
Important 3D scanner features include accuracy, resolution, scan speed, alignment method, working range, portability, software capability, and export compatibility. For professional users, the best scanner is not always the most expensive one; it is the one that consistently produces usable data for the required application.
Video Guide: This comparison-style video is useful for seeing how different scanners can vary in performance and usability.
Feature Comparison for Real-World Selection
Based on our internal data and market analysis, here is the breakdown:
| Feature | Why It Matters | Entry-Level Scanner | Professional Industrial Scanner | STScan Advantage |
|---|---|---|---|---|
| Accuracy | Determines measurement reliability | Moderate | High | Single-point accuracy up to 0.005 mm |
| Scan speed | Affects productivity | Slower on complex parts | Faster capture and processing | 1-second single-side scanning capability |
| Light technology | Influences surface capture and stability | Basic LED, laser, or camera methods | Structured light or advanced laser systems | Self-developed blue-light structured-light core |
| Ambient light resistance | Helps in workshop conditions | Often sensitive | Better controlled performance | Strong anti-environmental-light interference |
| Alignment method | Impacts setup time | Markers or manual alignment may be needed | Geometry, markers, or automation | Markerless automatic stitching |
| Portability | Supports field and shop-floor work | Often compact | Varies by model | Portable body design |
| Software algorithms | Determines workflow efficiency | Basic mesh generation | Inspection and advanced processing | Self-developed algorithms and architecture |
| Compatibility | Ensures downstream use | Limited formats | CAD, inspection, and mesh workflows | Strong data compatibility |
| IP and R&D depth | Indicates technical maturity | Limited proprietary technology | Varies by brand | 20+ patents and self-developed architecture |
A strong scanner balances hardware and software. Accuracy is critical, but scan speed, reliable alignment, and export compatibility determine whether the device works efficiently in daily production. This is especially important in industrial inspection and reverse engineering, where repeatability and traceable results matter.
STScan Pro Tip: I never judge a scanner by accuracy alone. If the scanner is slow, hard to align, or difficult to export from, the project cost rises even when the specification sheet looks impressive.
Cost & Buying Factors
3D scanner pricing varies widely, from low-cost phone apps and hobby devices to professional systems used for metrology, reverse engineering, and industrial inspection. The right budget depends on required accuracy, object size, software tools, support, calibration reliability, and how much time the scanner can save.
Video Guide: This buying guide is relevant for understanding the practical factors that influence scanner selection and total cost.
Pricing Guide and Purchase Criteria
Based on our internal data and market analysis, here is the breakdown:
| Category | Typical Use | Cost Level | Buyer Priority |
|---|---|---|---|
| Smartphone app | Visual models, room capture, casual use | Low | Convenience |
| Hobby scanner | 3D printing, learning, simple objects | Low to moderate | Ease of use |
| Prosumer handheld scanner | Small business, design, basic reverse engineering | Moderate | Flexibility |
| Industrial scanner | Inspection, precision measurement, engineering | Higher | Accuracy and repeatability |
| Metrology-grade solution | Quality control, tight tolerances, regulated workflows | Premium | Verified performance |
Beyond purchase price, consider the full cost of ownership:
- Software licensing: Some systems require ongoing subscriptions.
- Training time: Complex workflows can slow adoption.
- Computer hardware: Dense scan data may require a powerful workstation.
- Accessories: Turntables, markers, fixtures, tripods, and scanning spray may be needed.
- Support quality: Fast technical help can reduce downtime.
- Application fit: A cheaper scanner becomes expensive if it cannot deliver usable data.
STScan is designed for users who need professional capability, including high precision, fast scanning, markerless stitching, and compatibility with industrial workflows. For buyers comparing options, the best value is usually the scanner that reduces rework and delivers dependable results across real projects.
STScan Pro Tip: I advise buyers to calculate cost per successful project, not just purchase price. A scanner that saves hours of cleanup or avoids failed inspections can pay for itself faster than a cheaper device.
Final Takeaways
A 3D scanner is valuable when you need to turn real-world geometry into accurate digital data. It can support design, quality control, reverse engineering, documentation, and 3D printing. The best choice depends on accuracy needs, workflow requirements, material challenges, and long-term productivity goals.
Video Guide: This introductory video reinforces the essentials and is a helpful recap for new users evaluating scanning technology.
Choosing the Right Path Forward
If you are evaluating scanning technology, start with the application rather than the device. A scanner for product visualization is very different from a scanner for industrial inspection. Define what you need to measure, how accurate the result must be, and what software output your downstream process requires.
A practical decision checklist includes:
- Define the object size and material Small precision parts, large assemblies, and reflective surfaces each require different strategies.
- Set the required accuracy Decide whether you need visual similarity, reverse-engineering data, or inspection-grade measurement.
- Confirm output formats Make sure the scanner supports STL, OBJ, PLY, CAD workflows, or inspection software as needed.
- Evaluate workflow speed Capture time, alignment, cleanup, and export time all affect productivity.
- Check support and scalability Choose a solution that can grow with future projects and more demanding applications.
For professional users, STScan offers a strong combination of blue-light structured-light technology, up to 0.005 mm single-point accuracy, 1-second single-side scanning speed, anti-ambient-light performance, markerless automatic stitching, and self-developed patented technology. It is especially relevant for industrial inspection, reverse engineering, and high-efficiency digital measurement.
STScan Pro Tip: I recommend booking a sample scan with your own part before purchasing. Real application data is the fastest way to confirm whether a scanner fits your accuracy, speed, and workflow expectations.