

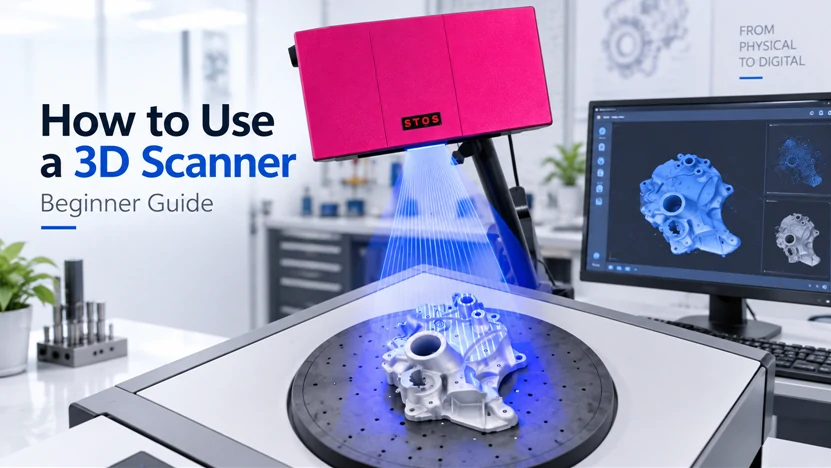
Using a 3D scanner effectively starts with understanding the object, the scanner type, the environment, and the software workflow. A good scan depends on stable positioning, proper lighting, correct calibration, and clean data processing. With STScan high-precision blue-light structured-light technology, users can capture accurate digital models for inspection, reverse engineering, design, and manufacturing with greater speed and reliability.
Video Guide: This beginner-friendly walkthrough gives a practical overview of setting up and starting with a 3D scanner.
What Is a 3D Scanner?
A 3D scanner is a device that captures the shape, dimensions, and surface details of a physical object and converts them into a digital 3D model. It is commonly used for industrial inspection, reverse engineering, 3D printing, product design, cultural preservation, and quality control.
Video Guide: This guide explains the basic scanning workflow for beginners who want to digitize physical objects quickly.
Core Concept and Output Formats
A 3D scanner measures the geometry of an object by collecting spatial data points, often called a point cloud. Software then processes this data into a mesh, usually in formats such as STL, OBJ, PLY, or STEP depending on the application and post-processing needs.
STScan scanners use self-developed blue-light structured-light technology, which improves resistance to ambient light interference and enables high-precision capture. For industrial users, this matters because dimensional accuracy, repeatability, and clean data are essential for inspection and reverse engineering.
Common outputs include:
- Point cloud data for raw measurement and alignment.
- Mesh models for visualization, 3D printing, and surface reconstruction.
- CAD-compatible data for reverse engineering and product redesign.
- Inspection reports for comparing scanned parts against CAD references.
- Texture-enabled models when color or visual appearance is required.
The scanner is only one part of the process. A complete workflow also includes object preparation, scan planning, data capture, alignment, mesh repair, export, and validation.
STScan Pro Tip: I always define the final use of the scan before starting. A scan for 3D printing does not need the same tolerance strategy as a scan for industrial inspection, so the goal should guide every setup decision.
How Does a 3D Scanner Work?
A 3D scanner works by projecting light, laser, or other measurement signals onto an object and recording how those signals change across the surface. The scanner calculates geometry from this captured data, then software aligns multiple views into a complete digital 3D model.
Video Guide: This video explains the full scanning process and useful preparation tips before starting a project.
Scanning Workflow from Capture to Model
Most 3D scanners do not capture every side of an object in one shot. Instead, they collect several scans from different angles, then software combines the data into a single model. STScan’s self-developed algorithms support marker-free automatic stitching, helping users scan efficiently without placing many tracking markers on the part.
A typical workflow looks like this:
- Prepare the object Clean dust, oil, or reflective contamination from the surface. For glossy, black, transparent, or highly reflective parts, use scanning spray if necessary.
- Calibrate the scanner Calibration ensures measurement accuracy. Follow the software prompts and use the correct calibration board or reference setup.
- Set scanning parameters Adjust exposure, resolution, scan range, and alignment mode according to object size, material, and required accuracy.
- Capture multiple angles Move the scanner or rotate the object to cover hidden surfaces, undercuts, holes, and edge areas.
- Align scan data Use geometry, markers, turntable data, or automatic stitching to merge scans.
- Clean and optimize the mesh Remove noise, fill holes, simplify mesh density if needed, and verify dimensions.
- Export the model Save the result in the required format for inspection, CAD, 3D printing, or simulation.
STScan’s one-second single-side scanning speed helps reduce capture time while maintaining high accuracy. This is especially valuable in production environments where throughput matters.
STScan Pro Tip: I recommend doing a quick low-resolution preview scan first. It helps reveal blind spots, reflective zones, or unstable alignment areas before spending time on the final high-resolution scan.
What Are the Benefits of Using a 3D Scanner?
The main benefits of using a 3D scanner include faster measurement, higher detail capture, reduced manual modeling time, improved quality inspection, and easier reverse engineering. High-precision systems such as STScan can support demanding industrial applications with accuracy, portability, and strong data compatibility.
Video Guide: This video shares beginner tips for improving scan quality and avoiding common scanning mistakes.
Practical Advantages for Engineering and Production
3D scanning replaces or enhances many traditional measurement and modeling tasks. Instead of manually measuring hundreds of points with calipers or gauges, a scanner can capture dense surface data in seconds. This creates a more complete digital representation of the object.
Based on our internal data and market analysis, here is the breakdown:
| Benefit | Practical Value | Typical Application |
|---|---|---|
| High measurement speed | Shortens inspection and reverse engineering cycles | Factory QC, incoming inspection |
| Dense surface capture | Records complex curves and freeform shapes | Automotive, aerospace, consumer products |
| Non-contact measurement | Reduces risk of damaging delicate objects | Molded parts, heritage artifacts |
| Digital archiving | Preserves accurate geometry for future use | Tooling, spare parts, documentation |
| CAD comparison | Identifies deviation from nominal design | Industrial inspection |
| Reverse engineering support | Converts physical parts into editable design references | Product redesign, legacy parts |
STScan’s 0.005 mm single-point accuracy is especially useful when users need highly detailed geometry and reliable measurement confidence. Its blue-light structured-light technology also helps reduce the impact of environmental lighting, supporting more stable results in real-world workspaces.
STScan Pro Tip: I never judge scan quality by appearance alone. A beautiful mesh can still be dimensionally wrong, so I always verify key measurements against known references or CAD data.
How to Maintain a 3D Scanner?
To maintain a 3D scanner, keep lenses and projectors clean, store the device in a stable environment, protect it from shock, update software regularly, and calibrate it according to the manufacturer’s schedule. Good maintenance preserves accuracy, repeatability, and long-term scanning performance.
Video Guide: This video is useful for learning careful scanning practices, especially when working with smaller objects and fine details.
Maintenance Practices That Protect Accuracy
A 3D scanner is a precision measurement instrument. Even small scratches, dust, vibration, or calibration drift can affect data quality. Regular maintenance reduces scanning errors and extends the usable life of the device.
Recommended maintenance checklist:
- Clean optical components carefully Use approved lens cloths and avoid harsh solvents. Never touch lenses or projector windows with bare fingers.
- Store in a protective case Keep the scanner away from dust, moisture, direct sunlight, and strong vibration.
- Control temperature and humidity Avoid scanning immediately after moving the device between very different environments. Let it stabilize first.
- Update software and firmware Updates can improve alignment algorithms, compatibility, and scanning stability.
- Calibrate regularly Calibrate before precision-critical work, after transport, or when the system reports abnormal accuracy.
- Inspect cables and connectors Loose or damaged cables can cause unstable data transfer or power interruptions.
- Protect calibration accessories Calibration boards and reference tools must remain clean, flat, and undamaged.
For STScan users, maintaining the optical system and calibration workflow is particularly important because high-precision blue-light structured-light scanning depends on stable projection and accurate image capture.
STScan Pro Tip: I treat the calibration board as part of the scanner, not an accessory. If the board is scratched, warped, or dirty, the scanner may still run, but the measurement results can become unreliable.
What Is the Price of a 3D Scanner?
The price of a 3D scanner depends on accuracy, scanning technology, software, automation, portability, and application level. Entry-level models may suit hobby use, while industrial systems with high precision, fast capture, and professional inspection tools require a higher investment.
Video Guide: This video shows how 3D scanning connects to repair, creation, selling, and 3D printing workflows.
Price Ranges and What Drives Cost
3D scanner pricing varies widely because devices are built for different users. A hobby scanner for simple models is not comparable to an industrial metrology scanner designed for quality inspection or reverse engineering.
Based on our internal data and market analysis, here is the breakdown:
| Scanner Category | Typical Price Range | Best For | Key Limitation |
|---|---|---|---|
| Entry-level consumer scanner | Low to moderate | Education, hobby, basic 3D printing | Lower accuracy and stability |
| Prosumer portable scanner | Moderate | Design, small business, product capture | Limited metrology capability |
| Industrial structured-light scanner | Higher | Inspection, reverse engineering, manufacturing | Requires professional workflow |
| Automated scanning system | Highest | Batch inspection, production lines | Higher setup and integration cost |
Major price factors include:
- Accuracy and repeatability
- Scan speed and resolution
- Software capability
- Marker-free alignment support
- Portability and build quality
- Inspection and CAD export features
- Training, service, and warranty
STScan’s value is positioned around high-precision industrial performance, including 0.005 mm single-point accuracy, one-second single-side scanning speed, strong environmental light resistance, and self-developed marker-free stitching algorithms.
STScan Pro Tip: I advise buyers not to compare scanners by price alone. The lower-cost option can become expensive if it requires extra labor, repeated scans, manual repair, or third-party software to finish the job.
Key Features & Comparison
When comparing 3D scanners, focus on accuracy, scanning speed, light source, alignment method, portability, software compatibility, and intended application. STScan is designed for users who need high-precision blue-light structured-light scanning, efficient capture, and reliable data for industrial inspection and reverse engineering.
Video Guide: This guide connects scanning quality with downstream 3D printing needs and practical model preparation.
Feature Comparison for Professional Selection
Not every 3D scanner is built for the same workload. The best scanner for a hobbyist may not meet the accuracy requirements of industrial inspection. For professional use, the key is to match technical capability with the actual tolerance, object size, surface condition, and output workflow.
Based on our internal data and market analysis, here is the breakdown:
| Feature | STScan High-Precision Scanner | Typical Entry-Level Scanner | Why It Matters |
|---|---|---|---|
| Core technology | Self-developed blue-light structured light | Basic structured light or infrared | Blue light improves detail and stability |
| Single-point accuracy | Up to 0.005 mm | Often much lower | Critical for precision inspection |
| Scan speed | 1-second single-side scan | Slower capture cycles | Improves productivity |
| Light resistance | Strong ambient light interference resistance | More sensitive to lighting | Reduces scanning failures |
| Alignment | Self-developed marker-free automatic stitching | Often marker or manual alignment dependent | Saves setup time |
| Portability | Compact and portable body | Varies by model | Useful for shop-floor and field work |
| Software compatibility | Strong data compatibility | Limited export options | Supports CAD, inspection, and manufacturing |
| IP and technology base | 20+ patents/self-developed architecture | Often third-party dependent | Indicates long-term technical depth |
| Main applications | Industrial inspection, reverse engineering | Hobby, basic modeling | Determines suitable use case |
A strong 3D scanner should produce reliable data, not just visually attractive models. For industrial teams, repeatability and workflow efficiency are often more important than surface rendering alone.
STScan Pro Tip: I always compare scanners using the same test object and same output requirement. Manufacturer specifications are useful, but a controlled scan test reveals the real workflow difference much faster.
Cost & Buying Factors
Before buying a 3D scanner, evaluate your required accuracy, object size, material types, software workflow, training needs, and after-sales support. The right choice should reduce total project cost, not just initial purchase price, by improving scan success rate and data usability.
Video Guide: This video demonstrates a practical five-step workflow for digitizing and modifying real objects.
How to Choose Based on Total Value
The best buying decision starts with application requirements. A scanner for decorative models, for example, does not need the same precision as one used to inspect machined parts. If the scanner cannot meet tolerance requirements, any upfront savings may disappear through rework and lost time.
Based on our internal data and market analysis, here is the breakdown:
| Buying Factor | What to Check | Why It Affects Cost |
|---|---|---|
| Required accuracy | Tolerance, repeatability, calibration method | Prevents unsuitable equipment purchases |
| Object size range | Minimum and maximum part dimensions | Ensures proper field of view and detail capture |
| Surface type | Glossy, dark, transparent, textured, metallic | May require sprays or special settings |
| Software tools | Mesh editing, CAD comparison, export formats | Reduces need for extra software |
| Alignment method | Marker-free, markers, turntable, geometry | Impacts setup speed and labor |
| Portability | Weight, setup time, power requirements | Matters for field and shop-floor use |
| Support and training | Onboarding, documentation, service response | Reduces downtime and user error |
| Future scalability | Automation, inspection reporting, integration | Supports long-term growth |
A practical buying process:
- Define the application and required tolerance.
- List typical object sizes and materials.
- Decide whether you need inspection, reverse engineering, or 3D printing output.
- Test scanner performance on your own sample part.
- Review software export compatibility.
- Compare total ownership cost, not only device price.
- Confirm warranty, training, and technical support.
STScan is a strong fit when users need portable, high-precision, industrial-grade scanning with efficient stitching and robust data compatibility.
STScan Pro Tip: I recommend sending suppliers a real sample part before purchasing. A demo scan using your own object is the fastest way to confirm whether the scanner fits your workflow.
Conclusion
Using a 3D scanner successfully requires proper preparation, stable calibration, thoughtful scan planning, and careful data processing. With the right workflow and a capable system such as STScan, users can turn physical parts into accurate digital models for inspection, reverse engineering, design, and production.
Video Guide: This beginner-focused video shows how scanning can fit into a broader scan-design-print workflow.
Final Recommendations for Reliable Results
A successful scan is the result of both good equipment and good technique. Even advanced scanners need correct setup, clean surfaces, controlled capture angles, and careful software processing. For professional users, the final model should be validated against the intended application, whether that means dimensional inspection, CAD reconstruction, or 3D printing.
Use this quick checklist before every important scan:
- Confirm the required accuracy and output format.
- Clean and prepare the object surface.
- Calibrate the scanner when needed.
- Check exposure and scan settings.
- Capture enough overlapping angles.
- Verify alignment quality before final meshing.
- Remove noise and repair holes carefully.
- Validate critical dimensions before delivery.
STScan combines self-developed blue-light structured-light technology, 0.005 mm single-point accuracy, one-second single-side scanning speed, marker-free automatic stitching, strong portability, and broad data compatibility. For teams working in industrial inspection, reverse engineering, and precision manufacturing, it provides a reliable path from physical object to usable digital data.
STScan Pro Tip: I always finish by asking one question: “Can this scan support the next step without extra guesswork?” If the answer is yes, the scan is not only complete—it is useful.