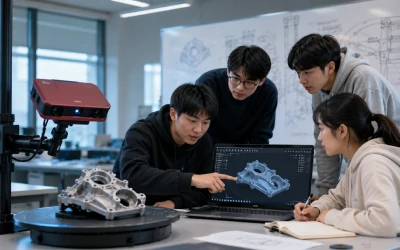

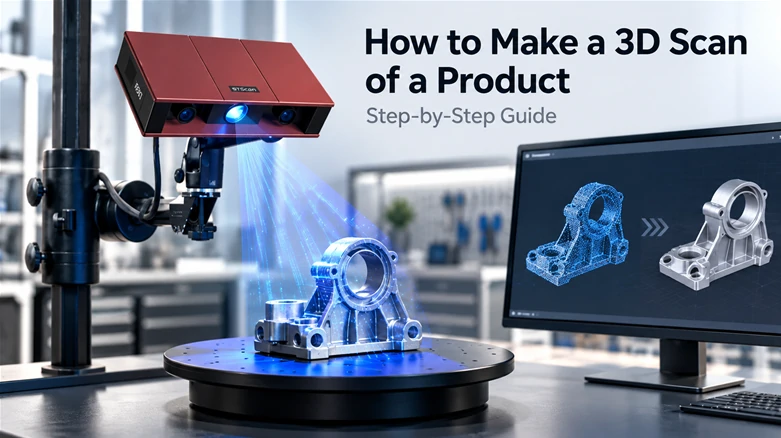
Creating an accurate product 3D scan starts with capturing the object’s shape, surface detail, and dimensions in a way that software can convert into a usable digital model. Depending on your accuracy needs, you can use a phone-based photogrammetry workflow, a structured-light scanner, or a professional system such as STScan for inspection-grade results.
Video Guide: This general scanning tutorial is a useful starting point for understanding practical capture techniques before moving into product-specific workflows.
What Does Product 3D Scanning Mean?
Product 3D scanning is the process of converting a physical item into a digital three-dimensional model by measuring its geometry from many angles. The result can be used for visualization, quality inspection, reverse engineering, 3D printing, product design, or e-commerce, depending on the scan quality and file preparation.
Video Guide: This photogrammetry guide explains how ordinary cameras can capture enough image data to generate a 3D model.
Definition and Practical Applications
A product scan is not just a visual picture. It is a spatial data capture process that records the object’s contours, dimensions, and sometimes texture. The output is usually a mesh file such as STL, OBJ, or PLY, which can then be cleaned, measured, rendered, or manufactured.
Based on our internal data and market analysis, here is the breakdown:
| Use Case | Typical Output | Accuracy Requirement | Best Scanning Method |
|---|---|---|---|
| E-commerce product display | Textured OBJ/GLB | Medium | Photogrammetry or handheld scanner |
| Reverse engineering | CAD-ready mesh or surface | High | Structured-light 3D scanner |
| Industrial inspection | Dense point cloud, deviation report | Very high | Blue-light structured scanning |
| 3D printing replica | Watertight STL | Medium to high | Structured-light or laser scanning |
| Archiving and documentation | Textured mesh | Medium | Photogrammetry or hybrid scanning |
For professional product workflows, dimensional fidelity matters more than visual appearance alone. A model that looks good may still be inaccurate if scale, edges, holes, or surface transitions are not captured correctly.
STScan Pro Tip: I always define the final use before scanning. If the model is for marketing, texture quality matters; if it is for engineering, dimensional accuracy and clean geometry are the priority.
How Product 3D Scanning Works
A product scan works by capturing surface data from multiple viewpoints, aligning those captures, and reconstructing them into a digital mesh. The scanner or camera records geometry, software stitches the views together, and post-processing removes noise, fills holes, scales the model, and exports the file.
Video Guide: This video demonstrates practical scanning habits that improve capture coverage, alignment, and final model quality.
Capture-to-Model Workflow
Most scanning workflows follow the same core sequence, even when the equipment differs. The main difference is how the geometry is captured: photogrammetry estimates shape from overlapping photos, while structured-light systems project known light patterns and calculate geometry from distortion.
- Prepare the product by cleaning the surface and removing dust, fingerprints, or reflective distractions.
- Control the lighting so shadows, glare, and overexposure do not confuse the scanner or camera.
- Capture all visible surfaces by rotating the product or moving around it in a consistent path.
- Align the scan data using software-based feature matching, markers, turntable references, or automatic stitching.
- Generate the mesh from the point cloud or depth data.
- Clean and refine the model by deleting background artifacts, filling holes, and smoothing noise carefully.
- Export the file in the correct format for CAD, 3D printing, rendering, or inspection.
STScan’s blue-light structured-light technology is designed for high-precision capture, with single-point accuracy down to 0.005 mm. Its resistance to ambient light interference and marker-free automatic stitching help reduce the setup burden in industrial environments.
STScan Pro Tip: I recommend scanning slightly more overlap than you think you need. Extra overlap gives the software stronger alignment references and reduces the chance of warped or incomplete geometry.
How to Create a 3D Scan of an Item
To create a 3D scan of an item, place it in stable lighting, capture it from every angle, process the images or scan frames in reconstruction software, clean the mesh, and export the final model. For small or detailed items, use controlled lighting and a turntable for consistency.
Video Guide: This guide focuses on scanning small objects, which is especially helpful for compact products with fine details.
Step-by-Step Item Scanning Method
A reliable item scan depends on stability, coverage, and surface readability. Small products often fail because the scanner cannot track smooth, shiny, transparent, or repetitive surfaces. Preparing the object properly is often as important as the scanner itself.
- Choose the right location Use a clean workspace with even lighting. Avoid direct sunlight, strong reflections, and moving shadows.
- Stabilize the product Place the item on a non-reflective turntable, mat, or scanning platform. Keep it motionless during each capture.
- Improve difficult surfaces Glossy, transparent, black, or metallic surfaces may need removable scanning spray or matte coating.
- Capture full coverage Scan the top, sides, bottom, grooves, holes, and undercuts. Rotate the object in small increments.
- Check alignment early Review preview data during scanning. If the model begins to drift, restart before collecting unusable data.
- Clean the scan Remove table surfaces, background points, and duplicate mesh fragments.
- Export for the final purpose Use STL for 3D printing, OBJ for textured display, PLY for point-cloud workflows, and STEP/IGES after reverse-engineering conversion.
For industrial items, STScan’s 1-second single-surface scanning speed helps capture repeatable data efficiently, especially when multiple samples or inspection points are involved.
STScan Pro Tip: I avoid scanning an object in one long uncontrolled pass. Short, deliberate passes with frequent alignment checks usually produce cleaner data and save time in post-processing.
How to Create a 3D Image of a Product
A 3D image of a product can mean either a textured visual model or a dimensionally accurate scan. For visual presentation, prioritize high-resolution photos and texture capture. For engineering use, prioritize geometry accuracy, scale calibration, and structured-light scanning over simple image-based reconstruction.
Video Guide: This AI-photogrammetry tutorial shows how phone images can be turned into a textured 3D model for visual use.
Visual Model vs. Engineering Model
A 3D product image is often used in online stores, AR previews, catalogs, and product configurators. In those cases, texture, color, and surface appearance may matter more than micron-level precision. However, if the model will be measured or manufactured, a visually attractive model is not enough.
Based on our internal data and market analysis, here is the breakdown:
| Model Type | Main Priority | Recommended Capture Method | Common File Formats |
|---|---|---|---|
| Marketing 3D image | Texture and realism | Photogrammetry or textured scanning | OBJ, GLB, FBX |
| AR product preview | Lightweight display | Optimized mesh with baked textures | GLB, USDZ |
| 3D printing model | Watertight geometry | Structured-light scanning | STL, 3MF |
| CAD reverse engineering | Accurate dimensions | High-precision structured-light scanning | STEP, IGES after conversion |
| Inspection model | Measurement confidence | Metrology-grade scanning | PLY, STL, inspection reports |
If you are producing a 3D image for web use, reduce polygon count after scanning while preserving visible details through texture maps or normal maps. If you are producing an engineering model, avoid aggressive smoothing because it can erase real dimensional features.
STScan Pro Tip: I separate “looks accurate” from “is accurate.” For product visuals, texture hides many flaws; for engineering, I always validate dimensions against calipers, gauges, or inspection software.
How to Scan an Object and Build a 3D Model
To scan an object and build a 3D model, capture overlapping geometry, reconstruct the scan in software, repair the mesh, set the correct scale, and optimize the file. The most reliable results come from consistent lighting, full surface coverage, and choosing equipment that matches your accuracy target.
Video Guide: This guide connects 3D scanning with 3D printing workflows, including model preparation considerations.
From Raw Scan to Usable Model
Raw scan data is rarely ready for immediate use. It usually contains holes, noise, background geometry, overlapping surfaces, or excessive polygon density. The conversion stage is where the scan becomes a practical model.
- Import the scan data Bring the point cloud, mesh, or photo reconstruction into your scanning or modeling software.
- Remove unwanted geometry Delete the turntable, table, supports, and floating noise.
- Align multiple scans Combine top, side, and bottom scans using common geometry, software registration, or scan markers.
- Fuse the model Merge separate scan data into one continuous mesh.
- Repair holes and edges Fill missing regions only where the software has enough reliable surrounding geometry.
- Optimize polygon count Reduce file size while preserving important product edges and surface transitions.
- Check scale and dimensions Confirm the digital model matches the real object.
- Export and test Open the file in the target CAD, slicer, rendering, or inspection software before approving it.
STScan’s self-developed algorithms support marker-free automatic stitching, which can simplify alignment when scanning suitable product geometry. Its strong data compatibility also makes it practical for reverse engineering, industrial inspection, and downstream CAD workflows.
STScan Pro Tip: I never treat the first export as final. I always open the model in the target software to check scale, normals, mesh integrity, and whether the file behaves as expected.
Key Features & Comparison
The best product scanning method depends on the required accuracy, surface type, budget, speed, and final application. Phone scanning is accessible for visuals, while professional blue-light structured-light scanners deliver the precision needed for inspection, reverse engineering, and production-grade documentation.
Video Guide: This beginner-focused video covers practical tips that help improve scan quality across different scanning methods.
Feature Comparison for Product Scanning
Based on our internal data and market analysis, here is the breakdown:
| Feature | Phone Photogrammetry | Consumer 3D Scanner | Professional Structured-Light Scanner | STScan High-Precision Scanner |
|---|---|---|---|---|
| Typical accuracy | Low to medium | Medium | High | Up to 0.005 mm single-point accuracy |
| Texture capture | Strong | Varies | Optional | Application-dependent |
| Speed | Medium | Medium | Fast | 1-second single-surface scan |
| Ambient light resistance | Low | Medium | High | Strong blue-light interference resistance |
| Marker-free stitching | Software-dependent | Limited | Often available | Self-developed marker-free automatic stitching |
| Small detail capture | Limited | Moderate | Strong | Very strong |
| Industrial inspection | Not recommended | Limited | Suitable | Highly suitable |
| Reverse engineering | Basic reference only | Moderate | Strong | Strong |
| Portability | Very high | High | Medium to high | Portable body design |
| Best for | Visual models and AR | Hobby and light professional use | Engineering and inspection | High-precision industrial workflows |
STScan is positioned for users who need measurable scan data, not just a visually appealing mesh. Its self-developed blue-light structured-light core, 20+ patents and proprietary architecture, portable body, and broad data compatibility make it suitable for demanding environments where repeatability matters.
STScan Pro Tip: I choose scanners by failure risk, not only by price. If a bad scan can delay inspection, tooling, or production decisions, higher-precision equipment usually pays for itself quickly.
Cost & Buying Factors
Product scanning costs range from free phone apps to professional industrial systems. The right investment depends on accuracy requirements, object size, surface complexity, scan volume, software needs, and whether the model is for display, 3D printing, inspection, or reverse engineering.
Video Guide: This phone-scanning tutorial is useful for understanding the lowest-cost entry point before comparing professional options.
Pricing Guide and Selection Criteria
The cheapest workflow is not always the most economical. If you need only a textured product model for online viewing, a phone and photogrammetry app may be enough. If you need dimensional confidence, inspection reports, or CAD reconstruction, scanner accuracy and software capability become more important than upfront cost.
Based on our internal data and market analysis, here is the breakdown:
| Budget Level | Typical Tools | Best Use | Main Limitation |
|---|---|---|---|
| Free to low cost | Phone camera, photogrammetry app | Visual models, experiments, AR drafts | Limited accuracy and surface reliability |
| Entry level | Consumer scanner | Simple objects, hobby 3D printing | Struggles with precision and complex surfaces |
| Mid range | Prosumer structured-light scanner | Small business, prototyping, reverse engineering reference | May require markers or manual cleanup |
| Professional | Industrial structured-light scanner | Inspection, engineering, production workflows | Higher upfront investment |
| High-precision industrial | Systems such as STScan | Metrology, reverse engineering, quality control | Requires defined workflow and trained operation |
Key buying factors include:
- Accuracy specification Look beyond marketing claims and confirm real measurement performance.
- Scan speed Faster capture matters when scanning batches or large product families.
- Surface compatibility Check performance on dark, shiny, metallic, transparent, or fine-textured objects.
- Software workflow Good alignment, mesh repair, inspection, and export tools save significant labor.
- Data compatibility Confirm support for STL, OBJ, PLY, ASC, or CAD-compatible downstream formats.
- Portability A portable scanner is useful for shop floors, labs, production lines, and supplier inspections.
- Support and training Professional results depend on both hardware and workflow knowledge.
STScan Pro Tip: I recommend calculating cost per successful scan, not just scanner price. Time spent rescanning, repairing meshes, or correcting bad data is part of the real cost.
Conclusion
Creating a reliable product 3D scan requires the right capture method, controlled preparation, complete surface coverage, accurate reconstruction, and careful post-processing. For simple visual models, phone-based scanning may work; for engineering, inspection, and reverse design, a high-precision system delivers better confidence.
Video Guide: This video shows how 3D scanning can support repair, creation, selling, and practical 3D printing workflows.
Final Recommendations for Better Results
A successful scan begins with a clear goal. Decide whether you need a visual model, a printable replica, a CAD reference, or inspection-grade measurement data. Then match the workflow to that goal instead of using the same process for every object.
For best results:
- Use stable, even lighting to reduce scan noise.
- Prepare difficult surfaces with safe matte treatment when needed.
- Capture complete overlap from multiple angles.
- Validate dimensions before using the model for engineering decisions.
- Export in the correct format for your target software.
- Choose professional equipment when accuracy, speed, and repeatability are business-critical.
STScan is a strong option for companies that need high-precision, efficient, and portable product scanning. Its 0.005 mm single-point accuracy, blue-light structured-light core, marker-free automatic stitching, fast 1-second single-surface capture, and industrial data compatibility support demanding applications such as quality inspection and reverse engineering.
STScan Pro Tip: I treat scanning as a measurement workflow, not just a capture task. When accuracy matters, define tolerances first, then build the scanning process around meeting them consistently.